The Standards Are Either Simple and Obvious — or They’re Not
Instrument calibration is a vital aspect of quality control, touching everything from the geometric parameters on drawing specifications to the methods used to measure and inspect precision metal parts.
Yet, there are some challenges (dare we say, headaches?) involved in the calibration standards for various measurement and inspection tools. While, in theory, calibrating is absolute, there are many reasons why it is not exactly absolute.
Even the shared assumptions about calibration standards are not without challenges. For instance, while there are accepted temporal intervals, technically a device could be out of calibration minutes after it has been calibrated.
In addition, the traceability of the documents used for calibration is normally tracked back to a standard established by the National Institute of Standards and Technology (NIST). However, there are some circumstances where there simply are no NIST standards for calibration.
Differences in Terminology
Measuring equipment is almost always calibrated, but there are certainly functional aspects of manufacturing equipment that need to be within specifications and therefore also need to be calibrated. However, even the term calibration is subject to some interpretation:
- When someone says they are doing a calibration, are they actually performing some action to bring a device back into specification?
- Or by “calibrating,” do they simply mean they are checking devices to see if they are still functioning within the specified tolerance according to the calibration standards?
For example, when we calibrate our ovens here at Metal Cutting, we are checking to make sure they are reading temperatures properly. If an oven is not working correctly, it is deemed out of calibration, and we will repair it and then perform the temperature calibration procedure again.
While ovens cannot be sent out to be calibrated, other specialized tools we use are regularly sent out for calibration, with the purpose of bringing them back into specification. This might involve a measurement equipment vendor cleaning a device or programming it to measure in a certain way. For this category of equipment, calibration is more akin to rebuilding than adjusting.
Lack of Traceable Calibration Standards
For some things, it is simple to imagine the objects or concepts that serve as the basis for the established calibration standards. For example, it’s easy to get traceable NIST calibration standards for parts that are 1.0” (25.4 mm) long or 0.04” (1 mm) in diameter.
However, it can be difficult to get a traceable standard for a part that is very long or a diameter that is very large or very small.
For instance, a standard that is 2 meters long or 10 microns in diameter is simply too difficult to handle, for opposite reasons. And what about calibrating for electrical resistance, such as the ohm resistance of deionized water?
There are techniques and methods for calibrating all of these. However, they are not as simple as calibrating for easy-to-handle lengths and diameters.
In the work we do with specialty metals here at Metal Cutting Corporation, we are often asked to ensure there are no cracks or voids in the metal we are either sent to process or we ourselves purchase and supply on behalf of our customers. Eddy current testing (ECT) is a familiar and interesting method we use that involves subtle techniques to inspect metal parts for surface flaws such as cracks.
However, one truism about ECT is that there is no NIST traceable standard to be used for calibration. Therefore, for flaw detection, reference standards are made by creating artificial defects, such as EDM notches. These reference standards are used to set ECT parameters such as frequency, amplitude, and sensitivity.
Tolerances and Other Dependencies
Manufacturers all want calibration to be an independent reference of an immutable standard. However, all calibration involves some dependency between the NIST standard that exists in a vault and everything that is measured thereafter down the supply chain.
So, whether it is an A2LA lab relying on their reference back to the object in the vault or a manufacturer that relies on objects that are referenced back to the independent lab’s object, there is always a series of contingencies in the execution of any calibration system, as well as tolerances in the system.
For example, the impact of stacked tolerances must be considered. If you send a piece of equipment out for calibration, you must remember to account for:
- The tolerance of the device being calibrated
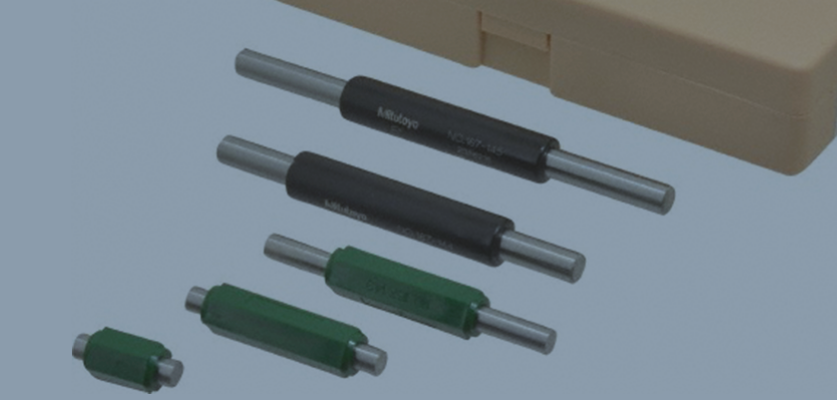
- PLUS the tolerance of the pin used to calibrate the device
- PLUS the tolerance of the lab that performs the task
Decimal Point Issues
Another issue that frequently comes up with calibration standards is, how many decimals out (how many zeros) should the calibration be? Here at Metal Cutting, we use a Class XXX pin gage with a tolerance of 0.000020″ (0.000508 mm) to calibrate something with a much looser tolerance, such as a hand micrometer that goes out to 0.00005″ (0.00127 mm).
Another interesting dimensional issue is that if an A2LA lab measures an object with a nominal of 1.000000″ to be 1.000003″ using their NIST-traceable equipment, then 1.000003” becomes the new normal. That is, it becomes the new size for calibrating measuring equipment that reads out to six decimal points.
Corroboration Across Devices, Calibration Method, and Tolerances
Additionally, two different people might measure a part, each using a calibrated device that is in perfect working order and within the confines of the specified tolerance, and yet there can still be a difference in their measurements. Perhaps one is using a device calibrated to the higher end of the tolerance range, while the other is using a device calibrated to the lower end.
Especially with precision parts having very small measurements, the question of whether calibrated measuring is consistent measuring this is another potential issue. It requires corroborating that users are not just measuring with same devices, but also that the devices are calibrated using the same method and to the same tolerance.
Three Distinctions in Calibration Standards
In the end, you might say there are really three distinctions in calibration standards:
- The obvious standards, such as NIST traceable calibrated pins for pass-fail inspection of lengths or diameters
- The not-so-obvious, such as those for temperature and other characteristics for which there are no objects that define the standards
- Those things for which there simply are no calibration standards at all, such as ECT
Here at Metal Cutting, where every day we produce thousands of small metal parts, these considerations are vital to maintaining our quality control standards so that we can deliver high-quality precision parts that meet customer specifications.


