Preventing and Detecting Surface Flaws Before They Become an Issue
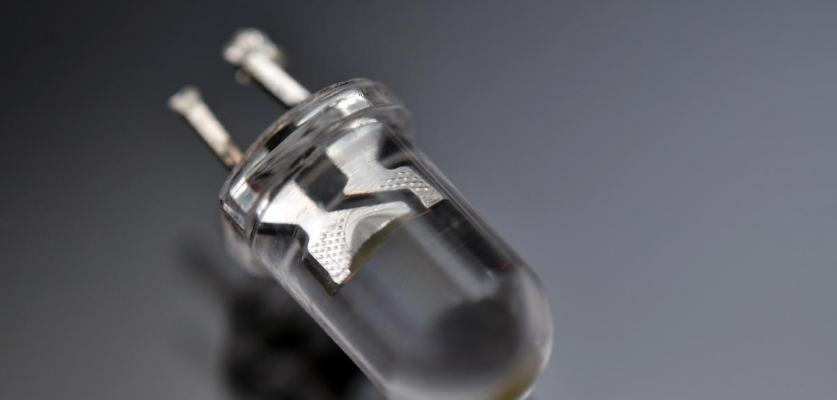
The glass to metal seal is a truly essential phenomenon in electronics, used in the manufacture of a wide range of products. From the “old-fashioned” (but still ubiquitous) incandescent light bulb to vacuum tubes, electric discharge tubes, and semiconductor diodes, to the reed switches in laptops and flip-phones, and pretty much any metal package of electronic components — without the hermetic glass to metal seal, our technological lives would undoubtedly be very different.
Across these applications, ensuring that there are no leaks is critical to producing a vacuum-tight seal in the assemblies through which electricity will be conducted. Yet, leakage is a real risk by virtue of the simple fact that, in general, metal expands at one rate and glass, at another — creating mechanical stresses during the melting process used to create the glass to metal seal. When the metal expands faster than the glass, the glass can crack; when the metal expands more slowly than the glass, gaps can occur.
What are some of the issues in a glass to metal seal?
While the relationship between the expansion of glass and metal is only one factor among many (depending on the specific application), making sure the expansion of the two materials is compatible is crucial to creating a glass to metal seal that does its job. However, with various glasses and metals having different coefficients of expansion, mechanical stresses — and therefore, leakage — may seem inevitable.
We’ll leave discussion of the choice of glass, and development of proprietary glasses for use in a glass to metal seal, to the glass experts. However, we can say that different glasses vary in how they flow, their densities, impurities, and other characteristics that can impact the strength and viscosity of the glass. In addition, irregularities in the surface of glass affect its strength and create stresses and variations that can lead to cracking and eventually, failure of the glass to metal seal.
Likewise, with any metal chosen for use in a glass to metal seal, the number one issue is whether the metal has a subsurface crack or outside surface condition that could jeopardize the integrity of the seal. The tricky part here is that a crack may be obvious — OR, it may be hard to see and not obvious in the least. There may be a latent issue that is not yet a crack, but that will develop when heat is applied to form the glass to metal seal. There may be a tiny pinpoint imperfection or a miniscule longitudinal crack that will turn into a full-blown crack with repeated thermal cycling. Even a surfacadne finish condition such as slight die lines in the surface of the metal can lead to cracks and ultimately, leaks in the glass to metal seal.
The good news is, steps can be taken to detect or prevent cracks and other metal surface finish issues that would stand in the way of a hermetic glass to metal seal and a stable end product.
How can we detect surface issues in the metal used for a glass to metal seal?
Eddy current testing (ECT) is a complex process with many interesting aspects and a wide range of applications. Among those, it is a widely used and effective method of inspecting for surface flaws in metal parts, including the round rod, flat ribbon, and capillary tubing used in a glass to metal seal.
ECT utilizes electromagnetic induction to detect and characterize surface and sub-surface flaws in conductive materials; it is also used to take thickness and conductivity measurements. In very basic terms, a coil is used to produce an oscillating magnetic field that, when applied to a conductive test material, induces an eddy current. The presence of defects in the test object, as well as variations in its electrical conductivity and magnetic permeability, causes corresponding changes in the eddy current. Measuring changes in phase, frequency, amplitude, impedance, and other characteristics, ECT detects defects including pitting, cracking, and corrosion.
There are various ECT techniques, including absolute eddy current testing, in which a probe with a single test coil probe is used to generate the eddy current and sense changes in the current field; differential eddy current testing, which uses two active coils and can be more sensitive to defects; and even combinations of the two, as well as other types of probes and methodologies. (If you’d like to learn more about this arcane but important metallurgical skill set, please feel free to give Metal Cutting Corporation a call.)
How can we prevent gaps that cause leaks in a glass to metal seal?
There are also fabricating methods that can be applied to the surface of the metal used in a glass to metal seal, in order to change the surface of the metal and reduce the likelihood of gaps that could cause leakage. For example, we can use centerless grinding to modify the outside diameter surface finish of the metal rod. By changing the surface from longitudinal features to radial features that are perpendicular to the length of travel of the wire, the centerless ground surface acts as multiple “hurdles” that allow the glass to adhere and prevent longitudinal leak points.
Combining preventative steps such as this with good design, careful ECT and visual inspection of parts for cracks and surface defects, and the right partner goes a long way in assuring that the glass to metal seal is air tight on day one and stays that way. In the end, you can be assured that critical electronic components are 100% tested along the supply chain, using various sophisticated etching and helium leak testing, which is arguably the ultimate test to determine if there is a leak in an electronic device.
Are you looking for a new partner for electronic components or other parts requirements? Download a free copy of our guide to outsourcing, 7 Secrets to Choosing a New Contract Partner: Technical Guide to Outsourcing Your Precision Metal Fabrication.


