How to Check Concentricity of Two Diameters (and Other Factors in Tube Sourcing)
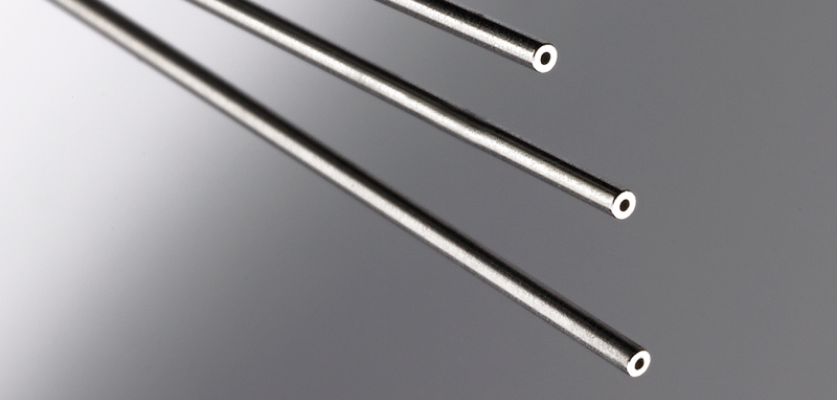
The issue of how to check the concentricity of two diameters often comes up in tube sourcing. It involves determining the wall thickness — the measurement between the outside diameter (OD) and inside diameter (ID) of a tube — at different points to see how constant it is in relation to a central axis.
The challenge lies in establishing a theoretical central axis that serves as the reference point (datum axis). That can make perfect concentricity almost as hard to measure as it is to achieve.
And that’s why it’s smart to keep the following things in mind before you specify tubing OD and ID measurements with concentricity requirements.
1. What Is Concentricity?
Among GD&T tolerances, concentricity is complex — a sort of “circular symmetry” used to establish a tolerance zone for the median points of a cylindrical or spherical part.
What’s the difference between cylindricity and concentricity? While cylindricity is an indicator of roundness and straightness along the full axis of a 3D part, concentricity compares an OD and ID or compares roundness at two different points.
Sometimes called coaxiality, GD&T concentricity “controls the central axis of the referenced feature, to a datum axis” according to the website GD&T Basics.
More simply put, you can define concentricity as a measure of the constancy of the wall thickness of a tube, pipe, or other cylinder. As such, concentricity controls a central axis that is derived from the median points of the part, measured in cross sections.
That means if concentricity were “perfect,” then the wall thickness between the OD and the ID would be the same in every cross section, at every point around the diameter of the tube.
What makes concentricity such a complex feature?
Tubing concentricity relies on measurements from a derived axis as opposed to a tangible surface. In other words, it creates a theoretical 3D cylindrical tolerance zone into which all the derived median points of the tube must fall.
That is exactly why concentricity is usually reserved for high-precision parts where there is a critical need to control those median points.
What is eccentricity vs. concentricity?
When you have variations in a tube’s wall thickness, you have an eccentric tube — one in which the center of the circle formed by the OD is at a different point from the center of the circle formed by the ID. (In other words, the two circles are not concentric.)
Eccentricity is measured by looking at a cross section to determine a tube’s minimum and maximum wall dimensions. Then calculate the difference between the minimum and maximum thicknesses and divide that figure in half.
2. OD/ID Concentricity Callouts
Tubing OD/OD concentricity requirements can be indicated on a drawing in several different ways, including:
- GD&T concentricity symbol, which is a circle within a circle
- Eccentricity percentage
- TIR (Total Indicator Reading)
- Written statements such as “OD and ID must be concentric within 0.00X inches”
Another term sometimes used when talking about concentricity is wall runout, which is the same thing as TIR. Wall runout is calculated by putting an indicator on the part while it spins on its axis, measuring not just the concentricity but also the circularity of the part.
Wall runout is derived from a tube’s eccentricity and describes the variation in wall thickness compared with a specified nominal wall. This can also be expressed as:
- The maximum wall thickness minus the minimum wall thickness
- Eccentricity x 2 (times two)
Where these (and other) terms are used in drawings to describe concentricity requirements, material suppliers and precision metal cutting shops are challenged to determine not only what machine process to use, but also how to measure the concentricity so that it will meet the specification.
3. Challenges of Measuring Concentricity
This brings us to the difficulty of how to measure concentricity and determine if the specified OD and ID are achieved. In addition to the issue of establishing the theoretical central axis, measuring concentricity requires:
- Taking many measurements across a series of cross sections
- Exactly mapping out the surface and determining the median points of the cross sections
- Plotting these series of points to see if they fall within the cylindrical tolerance zone
You could use a micrometer or optical comparator to measure the concentricity of some parts. However, the task is best performed using a coordinate measuring machine (CMM) or some other computer measurement device. However, CMM is time-consuming, which in turn means added cost.
Another challenge is that with today’s micromachining, the parts to be measured are often smaller than ever before. For instance, in the case of tiny precision-cut tubes used as components in medical devices, the challenge lies in how to check concentricity of two diameters in very, very small tubing.
4. When Concentricity Is Needed
With all of this complexity, concentricity is usually only used for parts that require a very high degree of precision in order to function properly.
Whether concentricity is critical depends on the end use, such as whether some physical entity with its own OD needs to fit into the tubing. For instance:
- In general, if a tube needs to go inside an opening and another part needs to fit into the tube ID, then the OD, ID, and concentricity may all need to line up for all those parts to work together.
- However, if the application requires liquid or gas to pass through a tube, concentricity may not matter, because tube non-concentricity would not impede flow-through.
But even where concentricity is not critical, it may be important to know how far out of concentric the OD/ID can be. For example, where a liquid or gas will flow through a tube under pressure, you may need to specify a minimum acceptable wall thickness to ensure that the pressure does not cause a break in a thin spot on the non-concentric tube wall.
To some extent, the choice of material may also relate to concentricity or minimum/maximum wall thickness. For instance, if you have chosen to use welded tubing that will undergo grinding to form a part, you may want to specify a minimum thickness to prevent the tube wall from being ground too thin and causing a break in the weld.
Likewise, if your end application will use a tube to move liquid under high pressure, a seamless material that is drawn and not welded might be a better choice, to minimize the risk of breakage. But again, if the tube will simply release air into the environment, then seamless tubing would be a case of over-engineering.
5. An Alternative: Concentricity vs. Runout
In some cases, you can avoid the time and cost of verifying concentricity by replacing concentricity requirements with runout, which is easier to measure and more readily achievable.
While concentricity looks at how well a cylindrical feature is centered on a theoretical axis, runout looks at how much the feature deviates from a perfect circle that is perfectly centered on an axis of rotation. In other words, runout is a combination of concentricity and circularity — and if a part is perfectly round, the runout will equal the concentricity.
While concentricity and runout are not the same thing, they often can be used interchangeably to achieve the same basic end result.
The big difference is that with runout, you can physically touch and measure the surface of the part. Controlling runout will also control the concentricity, although admittedly not to the same extent as when concentricity is applied on its own.
(Learn more about runout, including circular routout, total runout, and TIR.)
Design Tubing with Achievable Tolerances in Mind
Remember, the feasibility of producing parts that are within your acceptable tolerances is a critically important consideration when doing your drawings. That is why most machinists, measurement techs, and design engineers recommend avoiding OD/ID concentricity whenever possible.
Instead, you can use other applicable GD&T symbols in your tubing drawings and designs — preventing the challenges of OD/ID concentricity by not designing it into the part in the first place.
To learn more about how specifying GD&T features and tolerances affects the quality of parts manufacturing, download our free paper How to Fine-Tune Your Quote Request to Your Maximum Advantage: Frequently Asked Questions in Small Parts Sourcing.


